When you’ve crafted your own shoestrings, finishing them neatly is the cherry on top! It’s a simple process that ensures durability and a polished look for your DIY creation. Here’s how you can sew the ends of homemade shoestrings effortlessly:
Table of Contents
ToggleSewing the Ends of Homemade Shoestrings
What You’ll Need:
To get started, gather these materials:
Homemade Shoestrings
Needle
Thread
Scissors
Steps to Sew the Ends:
Step 1: Secure the Thread
Thread your needle with a piece of thread that matches the color of your shoestrings. Knot the end of the thread to secure it in place.
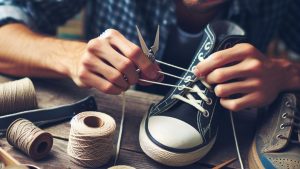
Step 2: Fold and Stitch
Take one end of the shoestring and fold it over about half an inch (1.27 cm).
Hold the fold in place and start stitching through the folded layers. You can use a simple running stitch or a whip stitch for this.
Step 3: Secure the End
- Continue stitching until you’ve sewn through all the layers securely.
- To finish off, create a knot by looping the needle and thread through the stitches and pulling it tight.
Step 4: Trim Excess Thread
- Once you’ve secured the end, trim any excess thread to tidy up the finished end of your shoestring.
Tips for a Polished Finish:
Matching Thread: Using thread that matches the color of your shoestring will create a seamless look.
Sturdy Stitching: Ensure your stitches are tight and secure to prevent the ends from unraveling.
Practice Makes Perfect: If you’re new to sewing, practice on a scrap piece of fabric or an old shoestring to get the hang of it.
So,…
Sewing the ends of homemade shoestrings is a simple yet crucial step in completing your DIY project. It adds durability and a neat finish to your creation. With just a needle, thread, and a few simple stitches, you can elevate the look of your handmade shoelaces!
Now that you’ve mastered this final touch, your homemade shoestrings are ready to add a personalized and stylish touch to your favorite pair of shoes.
Enhancing Your Shoelaces
Adding Aglets for a Professional Touch
You’ve nailed sewing the ends of your homemade shoelaces! Now, let’s take it a step further by adding aglets. These small, metallic or plastic tips not only give a professional finish but also prevent fraying, ensuring your shoelaces stay intact for longer.
Materials You’ll Need for Aglets:
Aglets (Metal or Plastic)
Glue (Preferably Craft or Super Glue)
Scissors
Steps to Add Aglets:
Step 1: Trim the Ends
Trim the ends of your shoelaces neatly to ensure they’re even and clean.
Step 2: Apply Glue Inside the Aglet
Take an aglet and apply a small amount of glue inside one end.
Step 3: Insert the Shoelace
Carefully insert the trimmed end of the shoelace into the aglet with the glue. Make sure it goes in all the way.
Step 4: Secure and Let It Dry
Press the aglet and shoelace together firmly for a few seconds to ensure a secure bond.
Allow the glue to dry completely as per the instructions on the glue bottle.
Step 5: Repeat for the Other End
Repeat the process for the other end of the shoelace.
Tips for Applying Aglets:
Precision Matters: Apply just enough glue to coat the inside of the aglet without making it messy.
Quick and Firm: Press the aglet onto the shoelace firmly but quickly to ensure a strong bond before the glue sets.
Show Off Your Creation
With these aglets in place, your homemade shoelaces now have a professional finish that not only looks great but also ensures they withstand the test of time. Your unique touch will stand out, giving your shoes a personalized charm that’s entirely your own.
Making Unique Shoelaces: Adding Personalized Touches
You’ve aced the basics and added aglets for that professional finish. Now, let’s dive into adding some personalized flair to your shoelaces. Whether it’s through colors, patterns, or special touches, you can make your shoelaces truly unique!
Experimenting with Designs:
1. Dip-Dye or Tie-Dye:
Use fabric dye or markers to create vibrant and colorful patterns on your shoelaces. Dip-dyeing or tie-dyeing can result in eye-catching designs that reflect your style.
2. Embroidery or Beading:
Get creative by adding embroidered motifs or small beads to your shoelaces. This adds texture and personality to your laces.
3. Customizing Length and Width:
Play with different lengths and widths to match various shoes or create a distinctive look. Shorter, thinner laces might suit sneakers, while longer, wider ones could be perfect for boots.
4. Adding Charms or Pendants:
Attach small charms or pendants to the ends of your shoelaces for an extra touch of uniqueness.
Tips for Personalization:
Playful Experimentation: Don’t be afraid to experiment with different techniques and materials. It’s all about expressing your individuality.
Test on Spare Laces: Before applying any permanent designs, try out your ideas on spare or inexpensive laces to perfect your technique.
Stand Out in Style
By personalizing your shoelaces, you’re transforming them into a reflection of your creativity and personality. Whether you opt for bold colors, intricate designs, or charming embellishments, your custom shoelaces will undoubtedly turn heads and add a special touch to every step you take.
Maintenance and Care for Homemade Shoelaces
You’ve put your heart into crafting and personalizing your shoelaces, and now it’s essential to care for them to ensure their longevity and continued charm. Proper maintenance can keep your homemade shoelaces looking fresh and vibrant for longer.
Simple Care Routine:
1. Gentle Cleaning:
Spot clean your shoelaces using mild soap and water. Gently scrub any stains or dirt with a soft brush or cloth.
2. Air Dry:
After cleaning, let your shoelaces air dry completely before using them again. Avoid using direct heat sources like dryers to prevent damage.
3. Storage Matters:
Store your shoelaces in a cool, dry place to prevent discoloration or mold. You can coil them neatly or use a small box or pouch to keep them organized.
Special Care Tips for Different Materials:
1. Fabric Shoelaces:
For fabric-based shoelaces, avoid harsh chemicals or bleach when cleaning as they may damage the material. Stick to mild cleaners.
2. Leather Shoelaces:
Leather shoelaces benefit from occasional conditioning with leather-specific products to maintain their suppleness and luster.
3. Embellished Shoelaces:
If your shoelaces have added charms or beads, handle them with care during cleaning to prevent damage to these elements.
Preventive Measures:
Rotate Usage: If you have multiple pairs of shoes, rotating your shoelaces between them can reduce wear and tear.
Inspect Regularly: Check your shoelaces periodically for any signs of fraying, and repair them promptly to prevent further damage.
Final Touch: Long-lasting Style
Taking a little extra care of your homemade shoelaces can go a long way in preserving their beauty and functionality. By incorporating these simple maintenance habits into your routine, you’ll ensure that your personalized shoelaces continue to complement your shoes and style for a long time.
Now, step out confidently knowing that your unique shoelaces not only look fantastic but also receive the care they deserve. Enjoy the compliments and pride that come with wearing your handmade and well-maintained shoelaces.
Faqs
Frequently Asked Questions About Homemade Shoelaces
1. Can I use any material to make homemade shoelaces?
Absolutely! You can get creative with various materials like fabric, leather, suede, or even paracord to craft unique shoelaces. Just ensure they are sturdy enough for everyday use.
2. How long should homemade shoelaces be?
The length depends on the type of shoe and lacing style. As a general guide, measure your old laces or refer to shoe-specific recommendations to determine the ideal length.
3. Are aglets necessary for homemade shoelaces?
Aglets aren’t mandatory, but they offer a professional finish and prevent fraying. You can use simple sewing techniques to secure ends, but aglets add durability and style.
4. Can I wash homemade shoelaces?
Yes, you can clean homemade shoelaces. Use mild soap and water for fabric laces, and for leather or delicate materials, consult specific care instructions or cleaners.
5. How do I prevent homemade shoelaces from fraying?
Proper maintenance, including gentle cleaning and periodic inspections for signs of wear, can prevent fraying. Repair any frayed areas promptly to avoid further damage.
6. Can I personalize store-bought shoelaces?
Absolutely! You can personalize store-bought shoelaces using techniques like dyeing, embroidery, or adding charms to make them uniquely yours.
7. What’s the best way to store homemade shoelaces?
Store them in a cool, dry place away from direct sunlight. You can coil them neatly or use a box or pouch to keep them organized and prevent discoloration.
8. How durable are homemade shoelaces compared to store-bought ones?
The durability of homemade shoelaces depends on the materials and craftsmanship. With proper care and quality materials, homemade ones can be just as durable as store-bought ones.
9. Can I make shoelaces for different types of shoes?
Yes, you can! Adjust the length and width of the shoelaces to suit various shoes, from sneakers to boots, ensuring a perfect fit and style for each pair.
10. Are there any safety tips for crafting homemade shoelaces?
When using tools like scissors or needles, handle them carefully to avoid accidents. If you’re working with younger crafters, adult supervision is recommended for safety.
Crafting your own shoelaces can be a fun and rewarding experience. Feel free to experiment with different materials and designs to create shoelaces that reflect your unique style and personality!
Comparison tabular
Here’s a comparison table for homemade vs. store-bought shoelaces:
| Aspect | Homemade Shoelaces | Store-Bought Shoelaces |
|---|---|---|
| Customization | Highly customizable; you choose materials and designs | Limited customization options |
| Uniqueness | Unique and personalized | Mass-produced, less uniqueness |
| Materials | You select materials based on preference | Often standard materials like polyester, cotton, or leather |
| Durability | Depends on craftsmanship and materials used | Consistent quality and durability depending on the brand |
| Cost | Can vary based on materials chosen and time invested | Generally standardized pricing |
| Repairability | Easily repairable with basic sewing skills | Replacement is often the only option for damaged laces |
| Environmental Impact | Can be eco-friendly if using sustainable materials | Manufacturing processes may vary in terms of sustainability |
Homemade shoelaces offer a personalized touch, allowing for creativity and uniqueness. On the other hand, store-bought shoelaces provide consistency in quality and durability with less customization. Both have their merits, so choosing between them often depends on personal preferences and needs.
Wrapping up
Crafting your own shoelaces is more than just a creative endeavor; it’s an opportunity to infuse your personality into something as simple as your footwear. Whether you choose to craft your own or opt for store-bought ones, what matters most is the satisfaction and individuality they bring to your style.
With homemade shoelaces, you embark on a journey of creativity and personal expression. They become a canvas for your imagination, reflecting your unique taste and style. On the other hand, store-bought options offer convenience and reliability, ensuring a consistent and durable addition to your shoes.
Ultimately, whether you’re designing, embellishing, or simply lacing up your shoes, the most important thing is to feel confident and comfortable. Let your shoelaces be a statement of your individuality, adding a touch of your personality to every step you take. So, go ahead, explore your creativity, and step out into the world with shoelaces that truly speak to who you are!

Mike the founder of The Shoe String Forum.com, has always had a lifelong love for shoes since he was a kid and with a fervent love for diverse brands like Adidas, Puma, Louis Vuitton, Nike, Birkenstocks, Hey Dudes, Crocs, Vans, Uggs, Converse, and New Balance, he passionately shares extensive footwear research through this platform.
Related Posts
- What is the best material to use for homemade shoestrings?
So, you've got a pair of worn-out shoes with frayed or missing shoelaces? Don't toss…
- How to Add Aglets to Your Homemade Shoestrings the right way
When it comes to making your own shoestrings, adding aglets gives them that polished, professional…
- How Can You Create Homemade Shoestrings Compatible Lace Locks?
Creating lace-lock-compatible homemade shoestrings is a cool DIY project that adds a personalized touch to…