Materials That Make Great Shoestrings
Cotton: If you’re aiming for versatility, cotton is your go-to material. It’s soft, flexible, and easy to work with, making it an excellent choice for casual shoes. Plus, it comes in various colors, allowing you to add a personal touch to your kicks.
Polyester: Looking for durability and colorfastness? Polyester is a sturdy option. It holds its shape well and resists fading, making it ideal for sports shoes that face rigorous use.
Nylon: When strength and resilience matter, nylon shoelaces step up. They’re tough, long-lasting, and water-resistant, perfect for outdoor or hiking shoes that need to withstand harsh conditions.
Leather: For a touch of sophistication and durability, consider leather. While it might require a bit more effort to work with, the end result is worth it. Leather shoestrings age beautifully, developing a unique patina over time.
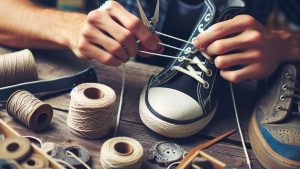
Crafting Your Shoelaces
Now that you’ve picked your material, it’s time to get crafting. Here’s a quick guide:
Measure Twice, Cut Once: Measure your old shoelaces for length, or measure the eyelets of your shoes. Add a little extra for knots and trimming.
Cutting: Use sharp scissors or a blade to cut the material into strips of the desired width. Aim for uniformity to ensure a consistent look.
Finishing Touches: Prevent fraying by sealing the ends of your shoestrings. You can use clear nail polish or heat (for synthetic materials) to seal them securely.
Lacing Up: Thread your new shoelaces through the eyelets of your shoes and tie them securely. Voila! Your custom-made shoestrings are ready to hit the pavement.
Choosing What’s Best for You
The “best” material for homemade shoestrings ultimately depends on your needs and preferences. Are you after comfort, durability, style, or a blend of these factors? Experimenting with different materials allows you to tailor your shoelaces to match your shoes and lifestyle.
Remember, DIY shoelaces not only breathe new life into your favorite pair of shoes but also reflect your creativity and personal style. So, grab your chosen material and start crafting your way to unique and functional footwear!
Crafting your shoelaces gives you the chance to express your personality while ensuring your shoes are both functional and stylish. Whether you opt for cotton’s versatility, polyester’s durability, nylon’s toughness, or leather’s sophistication, the key is to choose what suits your needs and style best. With a little creativity and the right material, you can lace up your shoes with a personal touch that stands out.
Maintaining Your Homemade Shoestrings
Now that you’ve crafted your own shoelaces, taking care of them ensures they stay in top-notch condition, keeping your shoes snug and stylish.
Cleaning Tips:
Spot Cleaning: For minor stains or dirt, use a damp cloth or an old toothbrush with mild soap to gently scrub the affected area.
Machine Washing: Some materials like cotton or polyester can handle a gentle cycle in the washing machine. Place them in a laundry bag or pillowcase to protect them from tangling.
Handwashing: For delicate materials like leather or specific colors that might bleed, opt for handwashing using a mild detergent and lukewarm water. Avoid soaking them for too long.
Storage Suggestions:
Dry Them Properly: After washing, air-dry your shoelaces away from direct sunlight or heat sources to prevent damage or color fading.
Keep Them Tidy: Coil your shoelaces neatly or use a shoelace organizer to prevent tangling and maintain their shape.
When to Replace:
Despite your best efforts, shoelaces will wear out over time. Keep an eye out for fraying, stretching, or weakening of the material. When they start to show signs of wear and tear, it’s time to replace them to avoid any mishaps while you’re on the go.
Crafting your shoelaces isn’t just a practical solution to revamp your footwear; it’s a fun way to add a personal touch. Whether you choose the soft versatility of cotton, the durability of polyester, the toughness of nylon, or the sophistication of leather, your homemade shoestrings can elevate your shoes and express your unique style.
Maintaining them with gentle cleaning, proper storage, and timely replacements ensures they continue to enhance your footwear while reflecting your personality.
Exploring Further Possibilities
Now that you’ve mastered the art of crafting and maintaining homemade shoelaces, let’s delve deeper into additional creative avenues and answers to some common queries about this delightful DIY project.
1. Embellishments and Personalization:
Ever thought about adding a unique touch to your shoelaces? Consider incorporating beads, charms, or even embroidery to infuse personality into your footwear.
2. Environmental Considerations:
Looking for an eco-friendly option? Upcycle old t-shirts, denim, or other fabric scraps to create one-of-a-kind shoelaces while reducing waste.
3. Kids’ DIY Fun:
Involve your little ones in the crafting process! It’s a fantastic activity to boost creativity and teach them practical skills while creating customized shoelaces for their shoes.
4. Custom Lengths and Styles:
Need shoelaces for specific shoes or styles? Experiment with different lengths, thicknesses, or braiding techniques to achieve the perfect fit and look for your footwear.
5. Repairing Shoelaces:
Instead of tossing worn-out shoelaces, consider repairing them. You can splice or stitch them back together at the frayed ends to extend their lifespan.
Your Shoelace Crafting Journey
Crafting your own shoelaces isn’t just about functionality; it’s an avenue for self-expression and innovation. Whether you’re aiming for personalized embellishments, eco-conscious choices, involving kids in DIY fun, customizing lengths and styles, or even repairing worn-out laces, the possibilities are endless.
The joy of creating something unique and practical, all while reducing waste or involving your loved ones, makes this DIY project a delightful journey. So, let your creativity flow, and lace up your shoes with shoelaces that truly speak to your style and story!
Faqs
Frequently Asked Questions About Homemade Shoestrings
Q1: How do I determine the length of shoelaces needed for my shoes?
To find the right length for your shoelaces, you can measure the old laces or count the number of eyelets on your shoes. As a general guide, sneakers typically require laces between 27 to 36 inches, while boots might need longer ones, usually around 45 to 54 inches. Always add a little extra length for knots and adjustments.
Q2: Can I use any material to make shoelaces?
You can experiment with various materials like cotton, polyester, nylon, or leather. Each material offers different benefits in terms of durability, flexibility, and style. Ensure the material you choose fits the purpose of your shoes and suits your preferences.
Q3: How do I prevent homemade shoelaces from fraying?
To prevent fraying, you can seal the ends of the shoelaces. For synthetic materials like polyester or nylon, using heat to melt the ends can work. Clear nail polish or fabric glue also serve well to seal cotton or other fabric shoelaces.
Q4: Can I wash homemade shoelaces?
Yes, most homemade shoelaces made from materials like cotton, polyester, or nylon can be washed. Use a mild detergent and either handwash or machine wash them in a gentle cycle. Leather shoelaces might require specialized cleaning techniques.
Q5: How long do homemade shoelaces last?
The lifespan of homemade shoelaces depends on the material used, the frequency of use, and maintenance. Generally, well-crafted shoelaces can last several months to a few years. Regularly inspect them for signs of wear and replace them when necessary to prevent accidents.
Q6: Are there any safety considerations when making or using homemade shoelaces?
When making shoelaces, ensure to use sharp tools carefully to avoid injury. When using homemade shoelaces, check for any potential tripping hazards due to excessive length or loose ends and trim them accordingly.
Q7: Can I customize the width or style of my homemade shoelaces?
Absolutely! You have the freedom to experiment with various widths, braiding techniques, or even add unique touches like beads or embroidery to personalize your shoelaces according to your preferences and shoe style.
Crafting Functional & Personalized Shoelaces
Crafting your own shoelaces opens up a world of creativity and functionality. By tailoring the length, material, and style to suit your shoes and personal taste, you can elevate your footwear while enjoying the satisfaction of a DIY project. Remember, safety and maintenance play crucial roles in ensuring your shoelaces serve you well while reflecting your unique style!
| Material | Advantages | Considerations |
|---|---|---|
| Cotton | Soft, versatile, easy to work with | Less durable, can absorb moisture |
| Polyester | Durable, colorfast, retains shape | May be less flexible than natural fibers |
| Nylon | Tough, long-lasting, water-resistant | Less soft compared to cotton |
| Leather | Sophisticated, ages beautifully | Requires more effort to work with, may need special care |
This table provides a quick overview of the main characteristics of each material. When choosing a material for your homemade shoelaces, consider factors like durability, flexibility, and the specific needs of your footwear to make the best selection.
Wrapping up
Crafting your own shoelaces isn’t just about fixing worn-out ones; it’s a chance to infuse your shoes with personality and functionality. Whether you opt for the soft versatility of cotton, the durability of polyester, the toughness of nylon, or the timeless sophistication of leather, the key is to choose what fits your style and shoe needs best.
Remember, this DIY project is not only practical but also a fun way to express your creativity. So, dive into the world of shoelace crafting, explore different materials and styles, and make your footwear stand out while reflecting your unique flair.
With a little imagination and the right material, you can transform a mundane necessity into a personalized statement, step by step!

Mike the founder of The Shoe String Forum.com, has always had a lifelong love for shoes since he was a kid and with a fervent love for diverse brands like Adidas, Puma, Louis Vuitton, Nike, Birkenstocks, Hey Dudes, Crocs, Vans, Uggs, Converse, and New Balance, he passionately shares extensive footwear research through this platform.
Related Posts
- What's the ideal material for durable shoestrings?
Shoelaces might seem like a small accessory, but their durability matters. The right material can…
- How Can You Create Homemade Shoestrings Compatible Lace Locks?Read moreShould you use the last shoestring holes on your walking shoes for physical activities use?
Creating lace-lock-compatible homemade shoestrings is a cool DIY project that adds a personalized touch to…
- Shoelaces or Shoestrings Is There a Difference?
The terms "shoelace" and "shoe string" might seem like they refer to different things, but…